notes on expressing an ESP32 microcontroller dev kit through a 16x2 LCD
Interfacing a 16x2 LCD with the ESP32 microcontroller is a common practice for displaying data directly from the microcontroller, enhancing user interaction in embedded systems. The ESP32, known for its robust processing capabilities and integrated Wi-Fi and Bluetooth, pairs effectively with LCD modules to present real-time information such as sensor readings, system statuses, or user prompts.
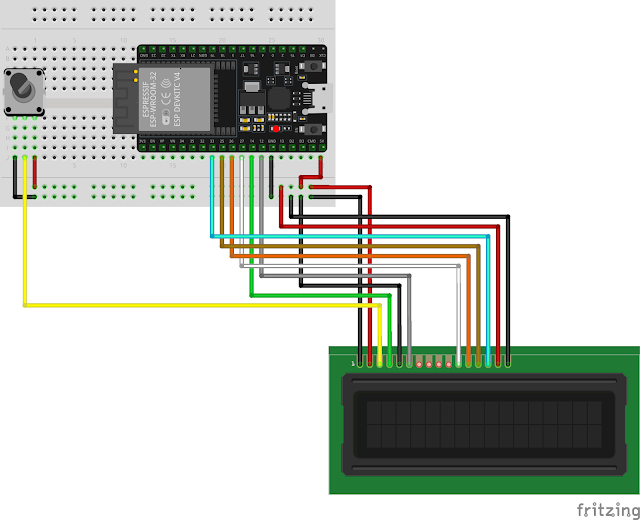
This post provides a practical guide on connecting a 16x2 LCD to an ESP32 detailing wiring connections, GPIO pins to use, and offers an example Arduino sketch utilizing the LiquidCrystal library to initialize the display and print messages.
Materials
- ESP32 DevKitc
- USB cable
- LCD 16X2
- potenciometer
- breadboard
- wires
Setup
Sketch
// include the library code:
#include <LiquidCrystal.h>
// initialize the library with the numbers of the interface pins
LiquidCrystal lcd(14, 12, 27, 26, 25, 33);
void setup() {
// set up the LCD's number of columns and rows:
lcd.begin(16, 2);
// Print a message to the LCD.
lcd.print("abcdefghijklm...");
}
void loop() {
// set the cursor to column 0, line 1
// (note: line 1 is the second row, since counting begins with 0):
lcd.setCursor(0, 1);
// print the number of seconds since reset:
lcd.print(millis() / 1000);
}


Comments
Post a Comment